

Imagine this: you’re standing in front of a dessert table at a holiday gathering, and there it is—a plate of perfectly round peanut butter balls, each one coated in rich chocolate. You pick one up, take a bite, and suddenly you’re transported back to childhood memories of homemade treats and cozy afternoons spent baking. Whether you’re looking for something sweet to satisfy your cravings or a simple yet impressive recipe to share with friends, peanut butter balls are exactly what you need.
These little spheres of creamy goodness have been delighting taste buds for decades. But they’re more than just a nostalgic treat—they’re versatile, easy to make, and downright delicious. In this guide, we’ll explore everything you need to know about peanut butter balls, from their origins to step-by-step instructions for making them, creative variations, health benefits, and tips for storing them properly. By the time you finish reading, you’ll be ready to whip up a batch that will leave everyone asking for seconds.
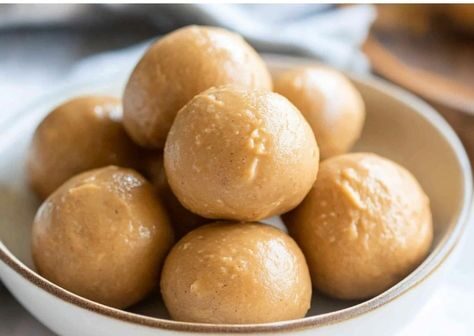
What Are Peanut Butter Balls? A Brief Overview
Before diving into the details, let’s break down what makes peanut butter balls so special. These no-bake desserts are typically made by combining creamy peanut butter, powdered sugar, and other ingredients like melted butter or vanilla extract. Once mixed, the dough is rolled into small balls, chilled, and often dipped in melted chocolate for an extra layer of indulgence.
A Bite-Sized History
Peanut butter has been a staple in American kitchens since the early 20th century, thanks to its affordability and versatility. Over time, creative home cooks began experimenting with ways to incorporate peanut butter into desserts. Enter peanut butter balls—a simple yet genius creation that quickly became a favorite for potlucks, holidays, and family gatherings. Their popularity stems from their ease of preparation and ability to cater to all kinds of dietary preferences when tweaked slightly.
Why People Love Them
There’s no denying the appeal of these treats. The combination of smooth peanut butter and rich chocolate creates a flavor profile that’s hard to resist. Plus, they’re bite-sized, which means you can enjoy them without feeling guilty (well, almost). Whether you’re hosting a party or simply craving something sweet, peanut butter balls are always a crowd-pleaser.
How to Make Classic Peanut Butter Balls: Step-by-Step Recipe
Ready to roll up your sleeves and get started? Here’s how to make classic peanut butter balls that are sure to impress.
Ingredients You’ll Need
To create these heavenly morsels, gather the following ingredients:
Step-by-Step Instructions
- Mix the Dough : In a large mixing bowl, combine the peanut butter, powdered sugar, softened butter, and vanilla extract. Stir until the mixture becomes smooth and pliable.
- Roll Into Balls : Scoop out small portions of the dough (about 1 tablespoon each) and roll them between your palms to form even spheres. Place them on a baking sheet lined with parchment paper.
- Chill the Balls : Pop the tray into the refrigerator for about 30 minutes. Chilling helps the balls firm up, making them easier to dip in chocolate later.
- Melt the Chocolate : Using either a double boiler or microwave, melt the semi-sweet chocolate chips. If using the microwave, heat in short bursts (about 30 seconds at a time), stirring in between to prevent burning.
- Dip and Decorate : Take each chilled ball and dip it into the melted chocolate, ensuring it’s fully coated. Use a fork or dipping tool to lift it out, allowing excess chocolate to drip off. Place the coated ball back onto the parchment paper.
- Add Finishing Touches : While the chocolate is still wet, sprinkle crushed nuts, sprinkles, or sea salt on top for added flair.
- Let It Set : Allow the chocolate to harden completely before serving. You can speed up the process by placing the tray in the fridge for 15–20 minutes.
Now that you’ve mastered the basics, let’s talk about ways to elevate your peanut butter ball game!
Creative Variations of Peanut Butter Balls
One of the best things about peanut butter balls is their adaptability. Feel free to experiment with different flavors, textures, and coatings to suit your preferences. Below are some ideas to inspire you:
Nutty Delight Version
If you love crunch, try incorporating chopped peanuts, almonds, or pecans into the dough. Not only does this add texture, but it also enhances the nutty flavor.
White Chocolate Bliss
For a lighter twist, swap semi-sweet chocolate for white chocolate. Drizzle dark chocolate over the finished product for a striking contrast.
No-Sugar Option
Looking for a healthier alternative? Replace powdered sugar with a keto-friendly sweetener like monk fruit or stevia. This version is perfect for those watching their sugar intake.

